alright, here you go people, took me a couple of hours

...
------------------------------
This is my first Photoshop tutorial. In it you will learn how to create a waving flag effect, including lighting.
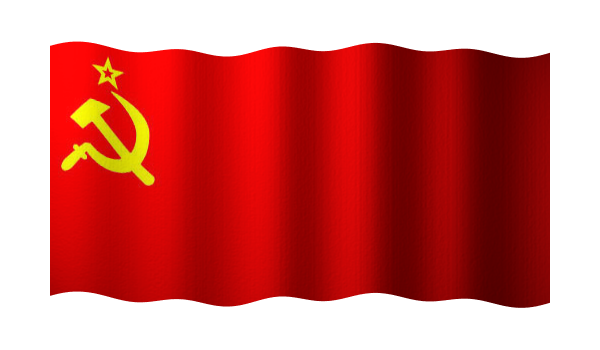
The first thing you need to do is open Photoshop, and open the flag which you wish to modify. For this tutorial I will be using the flag of the USSR. Then make sure that your flag’s layer is not background. If it is, right click on the layer and click Duplicate Layer. Then delete your background layer.
The next thing you must do is increase the canvas size. This is done by going to the Image Menu, and clicking Canvas Size. You need to add about 100 pixels to both height and width, perhaps more or less depending on the size of your flag. Remember, too much can be fixed later, but too little cannot. You do this so that once you make the flag wave, its edges will not go off the edge of the image.

Now you must create a new image with the same dimensions as your new flag image. If you have forgotten your image size, just go back to canvas size, and it will say near the top portion of the window.
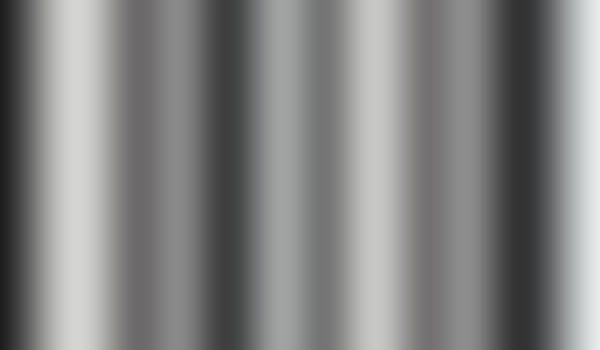
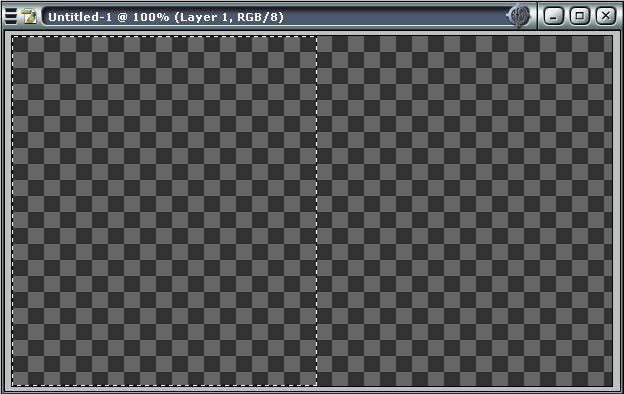
This new image will be what we call the bumpmap. The first thing you must do is take the marquee selection tool and select about half of the image, it doesn’t have to be perfect.
Now select the gradient tool. Go to the gradient options where you modify the gradient. It should look something like this
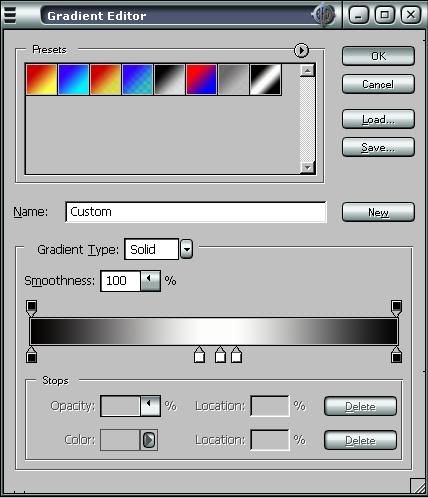
Now set the gradient to linear, and draw a horizontal line across the selection, to make it straight hold shift as you draw it. Your image should now look like this.

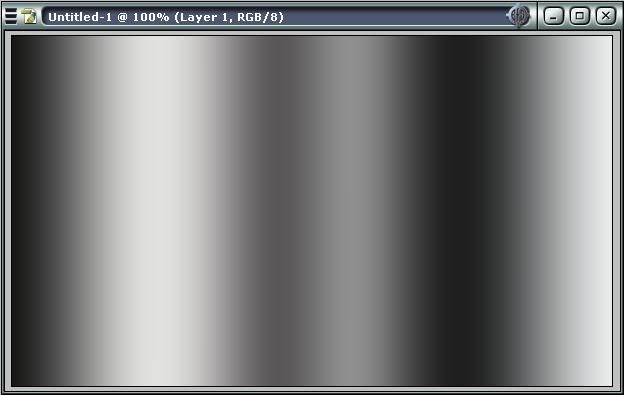
Now go to select and click inverse. Once again draw a horizontal line gradient. Now you must invert this side. So leaving it selected, go to Image, Adjustments, and click Invert. Now deselect your selection, click on Filter, Blur, Gaussian Blur. Set it to something you think looks good (needs to be blended together well). Now your image should look like something close to this.
Now time to save. Go to save as, and save it as something like bumpmap. It needs to be a .psd file. Now go back to your flag image. Go to Filter, Distort, Displace. Make the Horizontal Scale 0. The Vertical Scale depends on how much you want the flag to wave and the size of your image. I want mine to have a slight wave and it is fairly large, so I will choose 20. The Displacement Map does not matter, and the Undefined Area should be set to Repeat Edge Pixels. When you click ok it will bring up a browsing window. Select your bumpmap you created earlier and click open. Your image should now look like something close to this.

This looks good, but there is no lighting. To do this, go to channels and click the button at the bottom of it that says create new channel. Copy and paste your bumpmap into it. Go back to layers, and select your flag layer. Take out your magic wand tool and select anywhere outside the flag with a fairly low tolerance, then go to the Select menu and click Inverse. Now go to Filter, Render, Lighting Effects. Your window should look something like this when done.
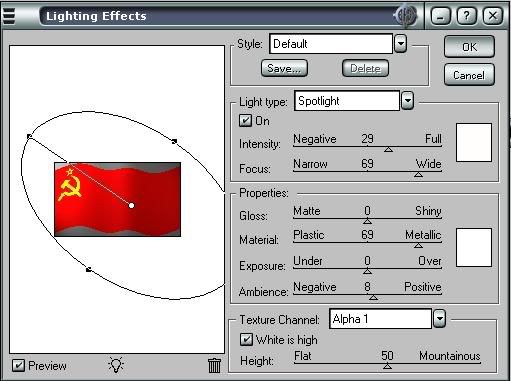
NOTICE: Texture Channel is set on the custom channel you created.
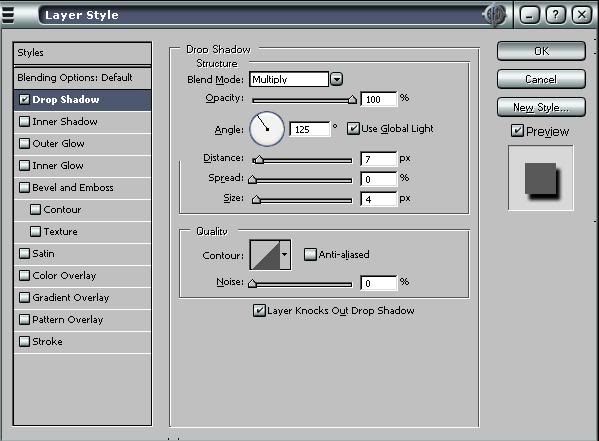
Now your image should look like a waving flag, but it seems to look a bit dull doesn’t it? To make it look slightly better, right click on the layer, and click on blending options. Go to Drop Shadow, the menu should look something like this
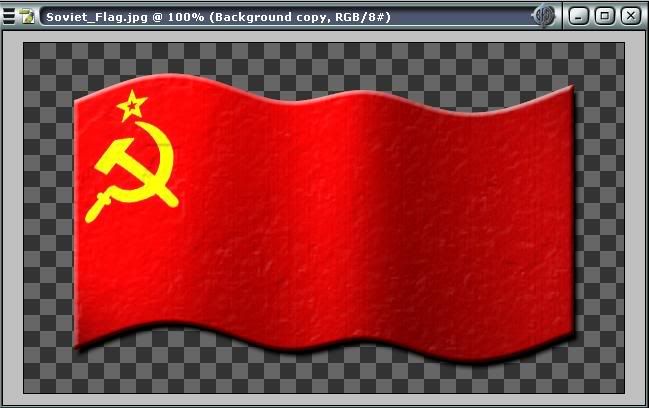
Now, to add a bit more, check bevel and emboss. The default setting for that should do. Now check texture. Go to the window for texture and click the arrow beside your current texture, then click the arrow on your right, and select Texture Fill 2, near the bottom. When a window pops up, click OK. Then click on the first arrow again, and select the very upper right texture. Set scale to 251% and depth to +22%. Invert should not be selected, but Link with Layer should be checked. Notice that these are my personal recommendations for the texture, use anything that you feel looks good. So now here is our final product.
You may want to crop off some of the extra transparent space now if you have too much. Now just save it as a file type that allows transparent backgrounds such as .png or .gif.
I hope this tutorial helped you,
SovieT
---------------------------
There you go, hope it helped