iverting colors doesnt really work, so i guess ill make a tutorial.....just for you drofder

-----------------------------------
This is a very openended tutorial, you can do many many things before you do the actual effect, i will give you one example, but you can go much more in depth to get a better effect like i did for my 3rd image. I will notify you at points when a lot of openendedness comes into play, and may even give you some other suggestions for cool effects. I will also just be taking the straight boring path to save time as i create this tutorial
1. The first thing you do is open a new document, i will be using a 800x600 pixel canvas.
2. Next, go to Filter > Render > Clouds
3. Now go to Filter > Render > Difference Clouds
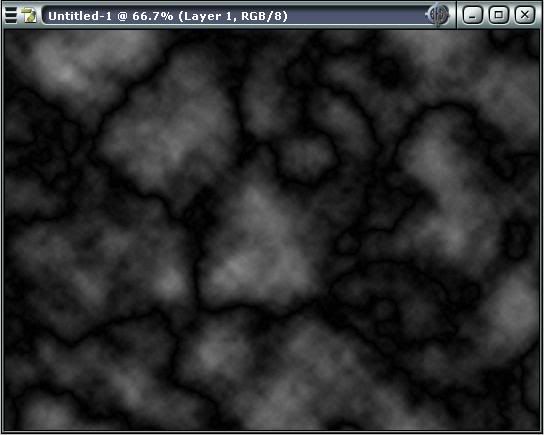
**at this point there is much that you can do, you can either simply proceed to the next step or fool around with the image.**
In the image fire3 above i did numerous things to make it look the way it does, and that I will explain simply, but not with much detail or pictures as i am too lazy to
Take your magic wand, set tolerance to somewhere around 20, and set continuous to off.
Now select a black area of the image and press delete.
Next, repeat steps 2-3 creating different layers about 3 more times.
Then create another layer, send it to the back, and make it black.
Next comes the effects-
On the top layers with the screwed up clouds, go to blending options, and set outer glow to on, and make it a large size. Differ the colors of the outer glow on each one to give more effect in the colors. Next, select bevel and emboss, set it to pillow emboss, make it down, increase the size slightly, and adjust other settings accordingly (i believe i set highlight color to a different color). Next select texture, and find a texture that suites you, make sure the texture is visible, but not too extremely visible. Go to color overlay, and select a color. Don't make it fully opaque, as you still want some slight variety in the color, but make it fairly opaque. In my image i used black as the overlay color.
On the bottom layer, check bevel and emboss, and texture, and set them according to whatever you want, this is just so there is no transperency is anywhere. Now make each of your top layers transparent, becoming more opaque the further back they go. On my image I used 50%, 60%, 70%, 80%, and then 100% for the background. Now go to Layer > Flatten Image, and duplicate your layer and delete the background layer so its all one layer but you can work with it again.
Now back on track with the normal tutorial
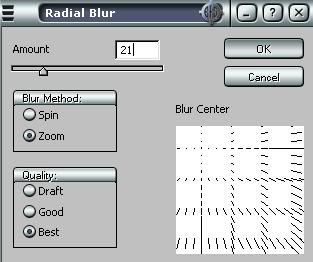
4. So now you've got an either very basic, or very strange piece of art depending whether or not you have done anything to it. The next step is to blur it
5. Go to Filter > Blur > Radial Blur, and set the settings similar to the ones below. Note that where the blur is going can differ however you want
6. Next, duplicate your layer and set blend mode to lighten
7. Go to Filter > Distort > Twirl. I set this to 300, but you can set it to whatever you think will look the best.
8. Now merge down
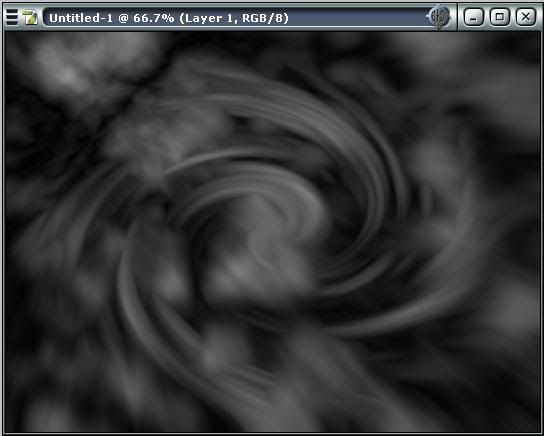
9. Repeat steps 6-8 once more, only this time, twirl to -600 (once again this can vary if you want it to look different)
10. Now you are pretty much done, you can adjust the colors to whatever the hell you want now by pressing CTRL+B and just moving the bars until you find a suitable color.
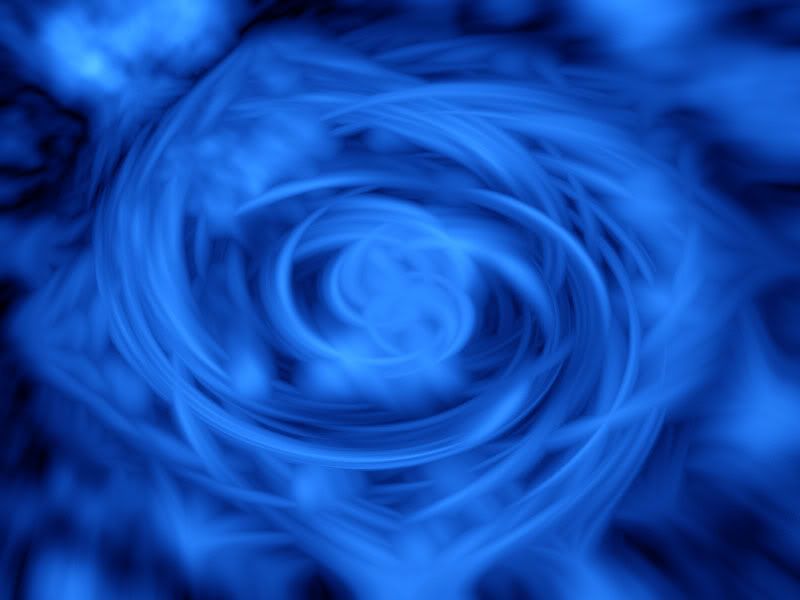
And there you go, remember that this is very open-ended and you can do a lot more with it than what i have shown you including lighting effects and lens flares and stuff

-------------------------------------------
There you go


