Page 1 of 2

Snowing Sig

Posted: December 22nd, 2005, 4:52 pm
by Soviet
well i decided to make a holiday type sig. So here it is...

Image

Posted: December 22nd, 2005, 6:04 pm
by Pwn-Rikku
Decent mate. :) and my new clan just won there first war:)

Posted: December 22nd, 2005, 6:45 pm
by Neon
awsome sig :P and gz rikku ;)

Posted: December 24th, 2005, 3:17 pm
by Pwn-Rikku
gz?

Posted: December 24th, 2005, 4:20 pm
by Lisa
I like it :!:

Posted: December 24th, 2005, 5:29 pm
by Neon
Pwn-Rikku wrote:gz?
gz - gratz - contrats - congratulations ! rawr

Posted: December 24th, 2005, 7:12 pm
by Soviet
the stupid snow on the website is slowing down my signature's snow :(

Posted: December 24th, 2005, 7:19 pm
by Pwn-Rikku
lol soviet it slows down my whole computer :P

Posted: December 24th, 2005, 10:53 pm
by Neon
mines fine ;)

Posted: December 25th, 2005, 12:54 am
by Soviet
Pwn-Rikku wrote:lol soviet it slows down my whole computer :P
its cause you got -|-3|-| |\|00|3 (0|\/|P|_|-|-3|2!!!!1111oneoneone

Posted: December 27th, 2005, 12:29 pm
by Pwn-Rikku
what.?

Posted: December 27th, 2005, 5:38 pm
by =(LF)= KnakWorst
You got the noob computer... :lol:

Posted: December 28th, 2005, 5:32 pm
by Pedsdude
Very nice sig m8 - that snow looks really realistic... can you do a tut? :P
Soviet wrote:the stupid snow on the website is slowing down my signature's snow :(
I'll remove it on the 31st December ;)

Posted: December 28th, 2005, 7:35 pm
by Soviet
Pedsdude wrote:can you do a tut? :P
*sigh* fine

Animated Snowing Effect

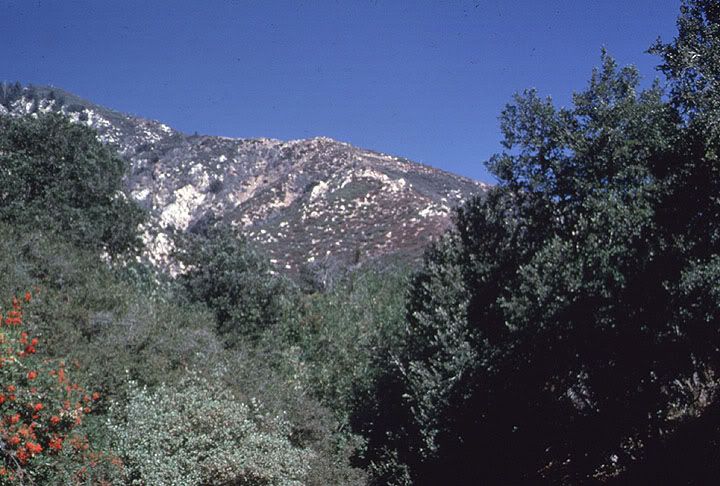
1. First, open your picture on photoshop, in this tutorial I'll be using this picture below

Image

2. Next, add a new layer and make it black using the paint bucket tool.

3. Then, change the blending mode to screen

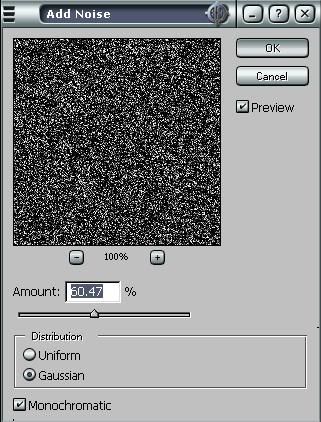
4. Now go to Filter > Noise > Add Noise and set it to levels similar to the ones seen in the picture below

Image

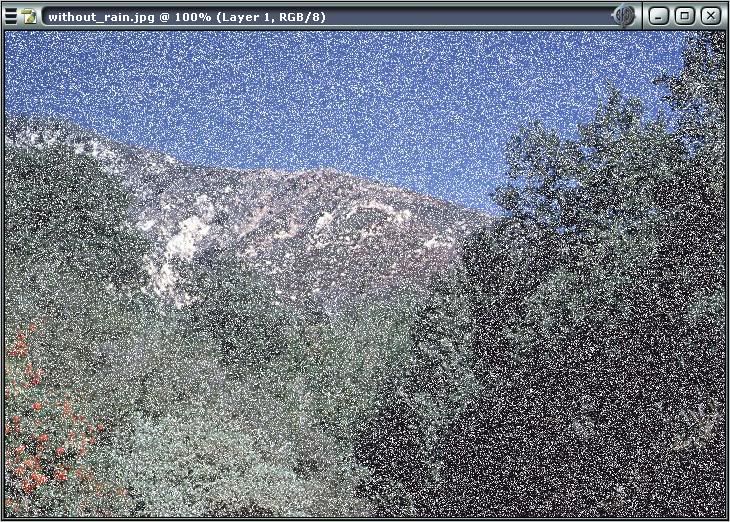
It should now look something like this:

Image

5. Next, go to Filter > Blur > Gaussian Blur. and set Radius to 1.1 pixels

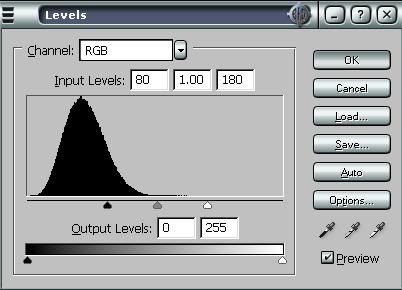
6. Then press CTRL+L to bring up the levels, it should look like the picture below. Note that you can vary your last input number depending on your picture to decide how you want the opacity of your snow to look, the higher the number, the less noticable and more transparent it is.

Image

7. Now repeat steps 2-6 about 4 times, varying step 4 slightly to make the snow more dynamic

8. Now time to edit it in imageready, click on the button to export the image to imageready

9. Create as many identical frames as you have layers of snow.

10. On the first frame, make all layers not visible except for your first layer of snow and your image.

11. On the next frame make only your image and the second layer of snow visible.

12. Repeat this until each frame has a different layer of snow.

13. Set frame length to somewhere near .1 seconds per frame

14. Save optimized as whatever you want.

unfortunately can't host the final animated picture because photobucket says the image is too big

There you go, hope it helped.

Happy now you ugly brit? :P

Posted: December 28th, 2005, 9:42 pm
by Lisa
Pedsdude wrote:I'll remove it on the 31st December ;)
NOOOOOOOO