Okay, understand this tutorial is for people making very simple things, or people that are good with photoshop. But also understand this is only for people who are making hardcore textures for their maps. There are plugins and other things to help you along the way, but for the most part you are on your own. So, lets get started
Definitions
Normal Map - A .tga file that creates the illusion that a texture is raised and lowered in certain areas to give a feeling of realism and more detail
Specular Map - A .tga file that determines the reflectivity in a detailed way off the surface of a texture to give a feeling of realism
Tools You'll Need and Other Useful Ones as Well
Photoshop - You can get a free trial at Adobe.com, I am using Photoshop 7 for the purposes of this tutorial. Used for making/editing the textures
Nvidia .DDS Photoshop Plugin & Normal map creator - You can get it Here. The .dds plugin helps to open and save .dds files in photoshop, and the normal map creator can automate the creation of normal maps, although I am not explaining how to do that in this tutorial.
IWI to DDS Converter - You can get it Here. This program changes IWI files to DDS files. This is useful if you wish to edit an existing texture, although we won't be doing that in this tutorial.
Getting Started
First, we need to create our basic texture in photoshop, this can be from something existing or from your skill with photoshop. However remember that the texture must be in this size of power of 2. (32x32, 64x64, 128x128, 256x512, 1024x1024, etc) I will be taking the picture of the stack below and recreating the base texture for it in a 512x512 texture.
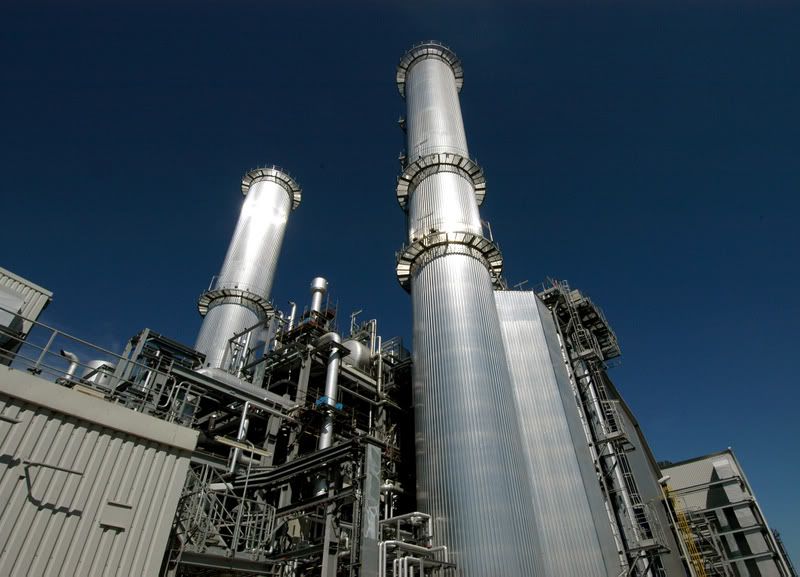

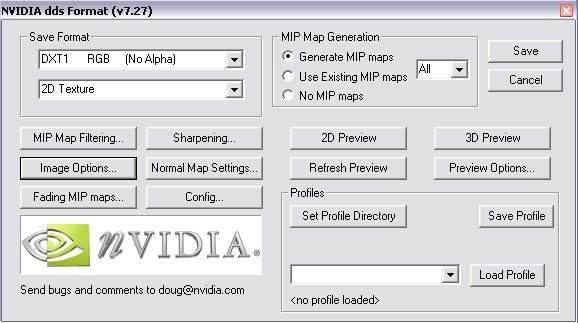
As you can see the texture is extremely simple, it is no more than a gradient of two of the colors off of the picture with some noise added and a slight motion blur filter. Now, save this file under your Call of Duty 2 base directory (Default: C:/Program Files/Activision/Call of Duty 2/Main) in a new folder in your main folder called images as a .dds file with properties similar to these (they don't have to be exactly the same). I saved mine as svt_plant_stack_01.dds
Normal Map
Time to make the normal map. I am continuing making my recreation of this texture so my Normal map will represent the patterned indentions in the metal vertically. To do this you must first understand how a specular map works. In a specular map a lighter color causes the surface to be more raised, and a darker color causes the surface to be more indented. So, for my texture I will be creating a pattern of white and black lines across the canvas (which is the same size as the original texture). After you are done either creating it manually or using the plugin, which is located at the bottom of the filters menu if you installed it, save the file in the same directory as the texture as a .tga file. I saved mine as svt_plant_stack_nrml_01.tga but yours can differ slightly in pattern to the original file. Here's my normal map.

Specular Map
The specular map works exactly the same way except the brighter the gray the more light it reflects. Creating this one is pretty manual too. I used my previous Normal Map and lessened the contrast a lot to create a lighter gray that differs slighty between sunken and risen. After you are done save your Specular Map to your images folder with your other two files as a .tga file. I saved mine as svt_plant_stack_specular_01.tga but yours can differ slightly in the pattern to the original file. Here is my specular map.

Pulling it all Together
Finally, it is time to go into the asset manager. Go down to material in the scroll menu, and create a new entry, I named mine svt_plant_stack. Now I am going to explain as many options in the asset manager as i understand.
Basics
materialType - What the material actually is, world phong is the default and should be used for all normal textures including this one.
sort - What type of texture this is, this differs from the materialType as it does not determine as much what you can physically do with the texture and what tasks the texture performs, but what the texture is. default is what you should choose in most circumstances unless you are creating one of the options other than that in sort.
surfaceType - How your surface reacts when shot or walked on, for mine I will be using metal, but you can use whatever you want.
usage - where your texture appears in editor. I will be doing exterior wall for mine, you can choose whatever makes sense to you.
Locales
Simply choose all the ones you want your texture to fall under in radiant. I chose tools for mine as it is easy to remember and spot.
Framebuffer Operations
All these I am fairly unsure on but I have never had any problems leaving them on default.
Color Map
This is where you put your normal texture, browse to it and select it.
tiling - How your texture spans outward, if for some reason you only want your texture to repeat sideways or vertically then you can choose it
filter - when and how your texture appears, auto filter is usually the best
compression - how your file is compressed, just leave on autocompression
Detail Map
Not quite sure at this point
Normal Map
This is where you put your Normal Map, browse to it and choose it. Tiling and filtering are the same as in Color Map.
Specular Color Map
This is where you put your Specular Map, browse to it and choose it. Tiling and filtering are the same as in Color Map. Strength is how strong your texture reflects, usually leaving this at 100 will give you the desired effect.
Cosine power map
Not sure right now but I think it has something to do with trigonometry
Special Surface Properties
As the asset manager says these are very rarely needed. Essentially these determine the traits for the texture as they state. For example, if you checked ladder the player would be able to climb up the texture in game. If you want just a normal texture don't select any.
Advanced Options
Useless, you don't even need to look at it.
Saving and Creating Your Texture
Go to File>Save As and name it the name you put when you hit the new entry button. Place this in the images folder. This does nothing more than allow you to open it later in asset manager and edit the texture so you can reconvert it with ease. Now, finally, go to PC Convert> Asset Only and a MS DOS window will appear for a few seconds, close it when its finished and you're done! Now simply add your texture where you want in CoD2 Radiant, compile, and you're done. Notice that you can go back and edit the texture then readd it and reconvert the asset in Asset Manager simply by opening your material at any point without even having to recompile your map.
NOTE: You must apply successful worldspawn and lighting for the Normal map and Specular map to appear, you might also have to turn up your graphics to DX9 if they are at 7 to see the effect.
And voila, here is my final product:
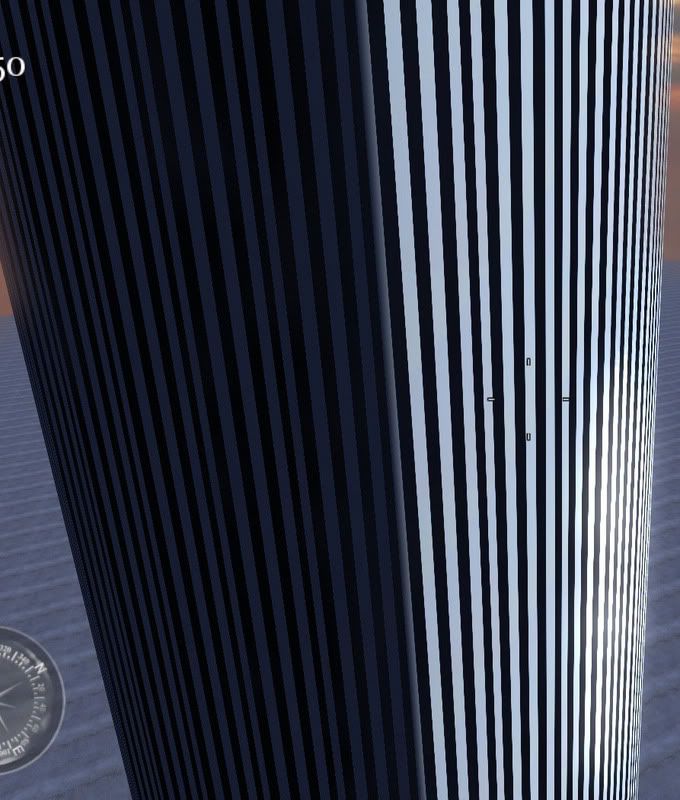
Keep in mind this isn't perfect, I made this in just a few minutes, with a bit more time you could add a whole lot more detail and make it look a lot more realistic. Good luck!
Soviet@CoDJumper.com
Please comment, this took me a long long time to make


